Setting Up Your Website (for writers): Part 2
 If you followed my advice you have your domain name and you’ve picked out your webhost. Good. You are on your way to setting up your own self-hosted website. Now to do the deed.
What we are going to do is the following:
Get your webhost and domain name provider talking.
Set up your domain name on your host provider.
Install WordPress.
Pick and install a WordPress theme.
Get Your Webhost and Domain Name Provider Talking
You may have bought your domain name from your host provider. This is the simplest solution, but not always to the most cost effective. However, if you did, skip this part and go to the next topic. However, if you did not then you need to set the Domain Name Servers on your domain provider’s site to the nameservers of your hostsite.
Your hostsite will provide your with your domain nameservers upon activation of your account. Nameservers come in pairs and look like this ns1234.yourhostsite.com & ns1235.yourhostsite.com Log into to your domain provider, pull up your account, and choice whatever option gets you to “Set Nameservers.” Type in your nameservers an press update. Though the process is the same, every site has its little variations, so I can’t get more specific than that, except in the case of GoDaddy.
Here are specific instructions for changing nameservers on GoDaddy:
1.) Log into your GoDaddy Account. On the “All Products” tab, go to “My Account”, then hit the “launch” button on “my domains”. Click on the little square box in front of your domain name and then the little “name server” box will light up. Click on “set nameserver”, then the “custom nameserver” radio button. Click on the link “Custom Nameserver” (You’re almost there) and enter your first nameservicer in the top box and an the second nameserver in the bottom box. Click the black “OK” button and the screen will say “validating”, then show a black “save” button. Hit the “save” button and the screen will return to show your domain name. Log out of GoDaddy.
Depending your domain provider’s site it can take several hours to up to a full day to connect to your hostsite.
Set Up Your Domain Name on Your C-Panel
Now its time to go to your hostsite and log-in to your C-Panel. Once there scan down the line of items to “Domains.” Click on “Addon Domains.” Type in the name of your domain with the “http” or “www” part of the name, for example “yourname.com”. C-Panel with automatically fill the boxes except your password. Enter the password you created for your website. Click on “Add domain.” Click “home” to take you back to C-Panel’s front page.
Install WordPress
Scan down software/services and click on Fantastico Deluxe. In Hostgator now there is also a button that says “Get Started with WordPress Today.” Either button is okay to click on. You will be sent to a screen that has a list of different blogging platforms. Click on WordPress. (And if necessary “continue.”) You’ll see the top line starting http:// and the name of your blog listed. Fill in the next boxes as listed and hit “Install.” (Oh, you are so close now.)
You’ll be taken to a screen that shows the installation. If you are prompted to add a email address and a password, do so. Finish up following the prompts. It’s time to pick out your WordPress theme.
Pick and Install a WordPress Theme
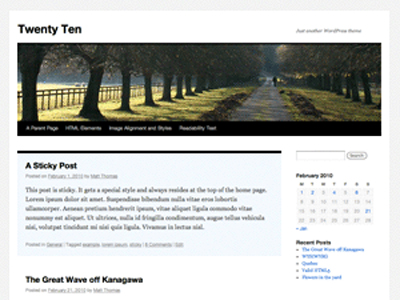
Let’s take a look at your website now. Every new WordPress installation comes with a standard theme. Go ahead, type in your brand new domain name into your browser and as long as the domain name provider and your hostprovider are talking, your site will come up. And it will look like the picture at the top. If the site doesn’t come up, because you just entered your nameservers, and the changes haven’t cycled, then wait a few hours.
Are you happy with 2010? Its a basic theme, clean in design and flexible. But if you want something extra, its easy enough to change the theme.
Type in http://yourdomainname.com/wp-admin/
This will always get you to the log in site. There should also be a “Log In” button on the page. Either way works. What you’ll see is the basic dashboard of your WordPress site.

Click on Appearance and then themes. You’ll be brought to the theme page. Click on the “Install Themes” tab at the top. Don’t worry, you aren’t doing any installing yet. You see a list of filters to click on. Click on any that appeal to you and press “Find Themes.” Up pops a selection of themes from which to choose. Take your time. Play with the filters or don’t use any filters at all, find something you like. When you do, click on “Install” and WordPress does its thing, and you now have your blog!
Congratulations! You are the owner of a self hosted blog. How professional is that?